

Vermicomposting turns leftovers into life for your plants
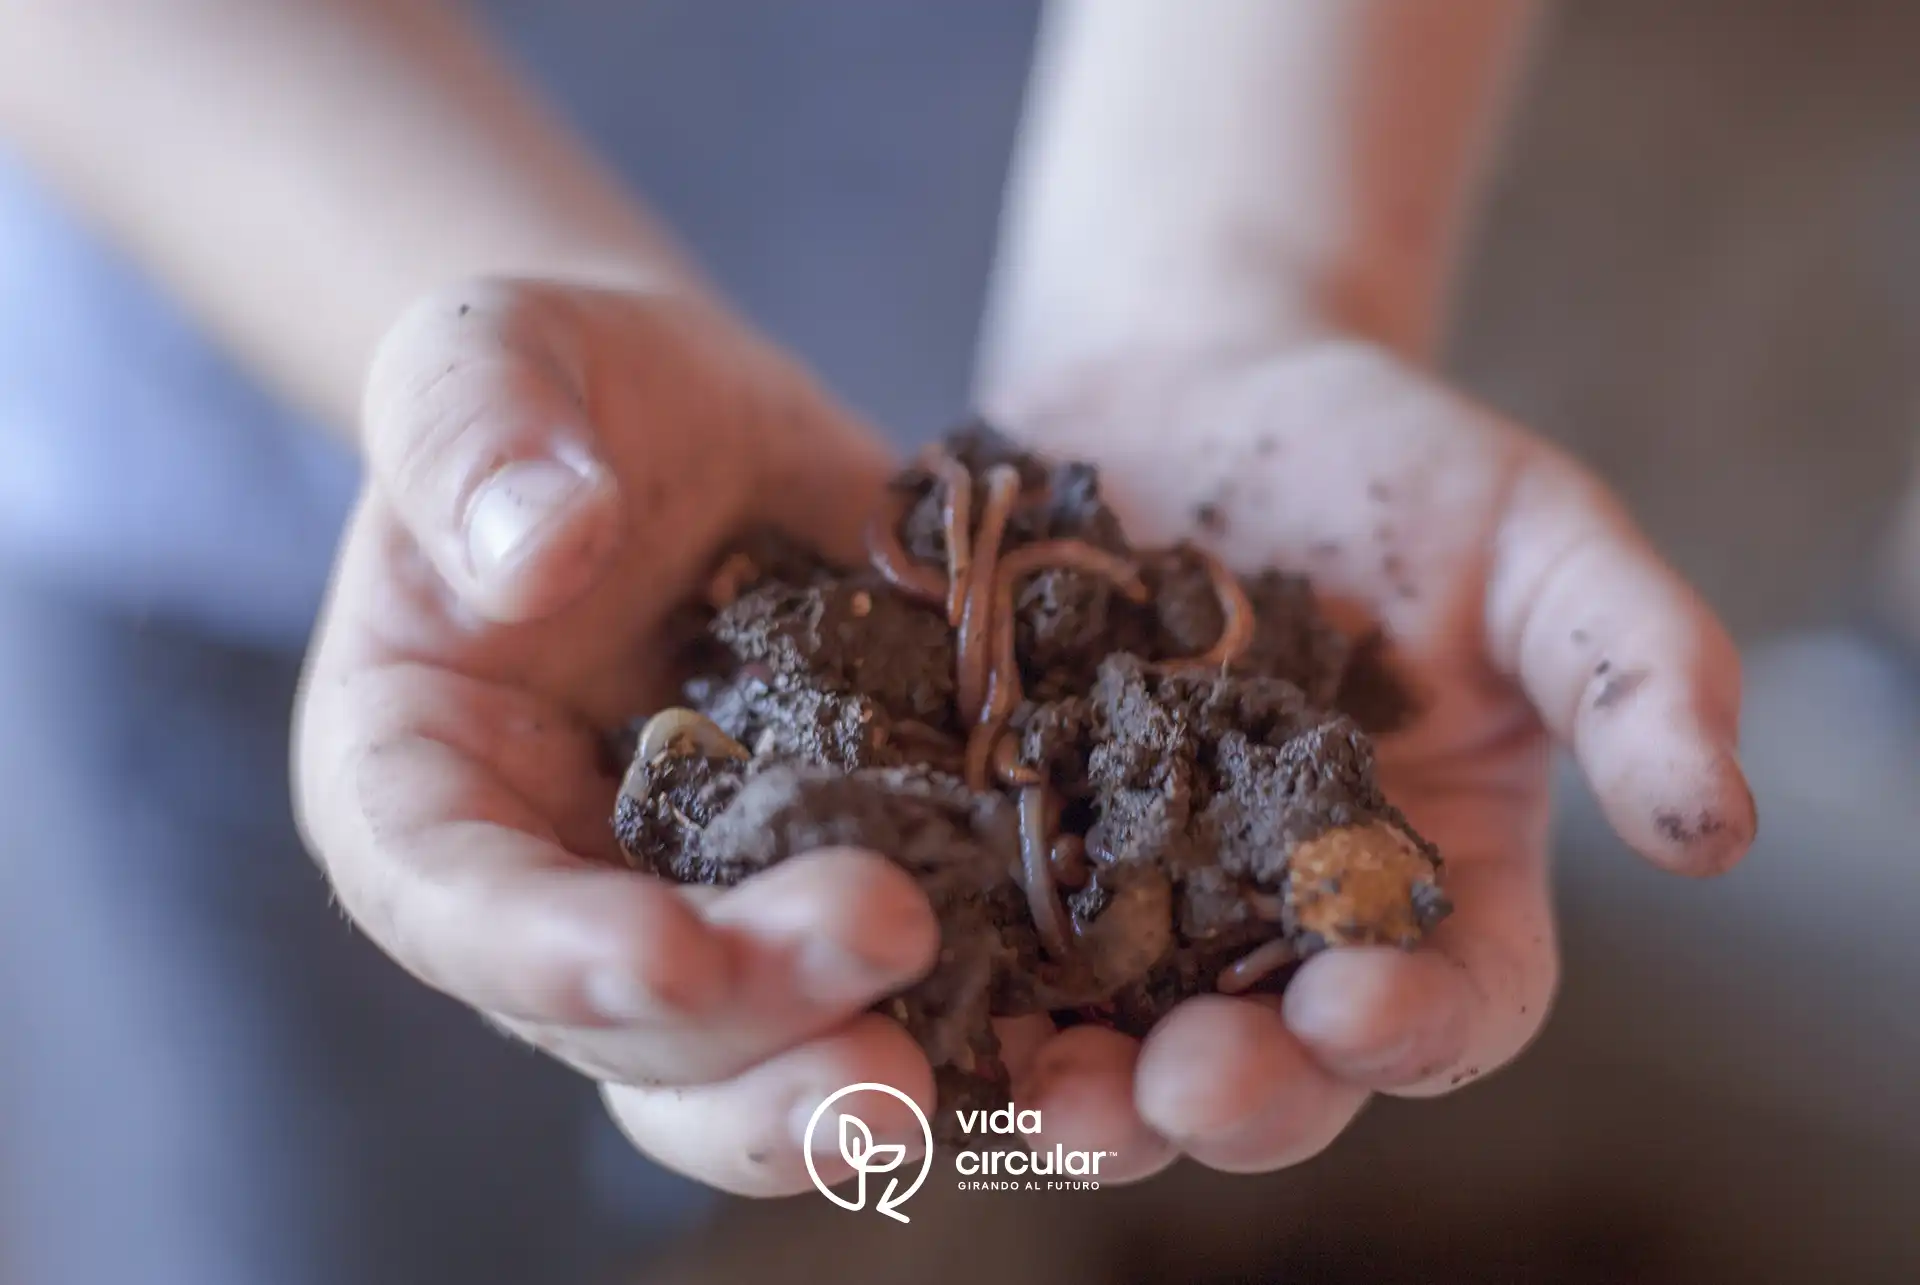
Vermicompost is a natural fertilizer that worms make by decomposing organic waste such as food and leaves. This process turns that waste into a nutrient-packed fertilizer, perfect for gardens, orchards and crops. Californian earthworms are the experts at transforming waste into a dark, pleasant-smelling humus that revitalizes your plants and soil.
Worm compost is like a gift to the soil. It has microorganisms and important nutrients such as nitrogen, phosphorus, potassium, calcium and magnesium. It also improves the soil, helping it to retain water and air, which is key to healthy root growth. Unlike chemical fertilizers, it nourishes naturally and constantly, maintaining soil balance and creating a healthy and fertile ecosystem.
Difference between vermicomposting and traditional composting
Vermicompost
- Worm digestion in a cool and controlled environment.
- Worms (especially Californian red worms) and some microorganisms.
- Low, generally kept in a cool environment.
- It takes approximately 2 to 3 months.
- High nutrient content, especially nitrogen, phosphorus and potassium.
- Nutrient-rich fertilizer, does not generate strong odors, improves water retention and soil structure.
- Requires worm care, may be slower in cold climates.
Traditional compost
- Microbial decomposition in the presence of oxygen at elevated temperatures.
- Microorganisms such as bacteria and fungi.
- High, reaching temperatures that accelerate decomposition.
- It may take 1 to 3 months, depending on the size of the pile and temperature.
- It contains nutrients, although in smaller quantities and depending on the composted material.
- Fast process in suitable conditions, ideal for large volumes of waste.
- Needs frequent handling (aeration), can generate bad odors if not well done.
 After
After
 Before
What is a vermicompost used for?
Easy guide to making vermicompost at home
Vermicomposting is an easy and environmentally friendly way to turn your organic waste into a nutrient-packed compost. With the help of worms, you can make a natural fertilizer that improves the soil in your garden or vegetable garden. Here's how to get started, without the hassle.
1.Get a suitable container
Choose a container to use as a "worm bin". It can be made of plastic or wood, but the important thing is that it has good ventilation. Make holes in it so that the worms can breathe and thus avoid the accumulation of humidity or the generation of bad odors due to lack of oxygen.
2. Prepare the starter bed
Begin by placing a layer of dry, soft material on the bottom of the garbage can, such as uninked cardboard, shredded paper or coconut fiber. This base not only maintains a pleasant environment for the worms, but also absorbs excess moisture.
3. Add worms
Red worms (Eisenia fetida) are ideal for vermicomposting, as they are efficient at breaking down organic materials. Place them on top of the initial bed and give them time to adapt to the new environment before introducing more food.
4. Add organic waste
Once the worms are settled, start adding organic waste in small amounts. You can include fruit peels, vegetable scraps, dry leaves and unprinted cardboard. Avoid citrus, dairy products, meats and fatty foods, as these can affect the pH of the garbage can and create an unpleasant environment for the worms.
5. Keep the environment moist
Worms need a moist environment, similar to a well wrung out sponge. Check the humidity regularly and, if necessary, add a little water to maintain the proper level. A dry garbage can will make it difficult for the worms to work, while too much water can drown them.
6. Processing time
Worm composting is usually ready within two to three months after the start of the process, depending on the amount of waste and the conditions of the container. During this time, the worms will decompose the waste into a dark, nutrient-rich humus.
7. Harvesting the worm compost
When the compost is ready, you will notice that it has a uniform texture and a pleasant moist earthy smell. To harvest the worm compost without losing worms, place the food at one end of the garbage can to attract them to that area. After a few days, you can remove the humus from the other end without taking the worms with you.
This method is a simple and natural way to take advantage of organic waste, while producing a high quality compost that improves the soil and helps plants grow.
Conclusion on vermicomposting
Composting is, simply put, giving a second life to what we would normally throw away. We convert food scraps and other waste into something that the soil really needs. And with vermicomposting, we can maintain this cycle in a continuous and simple way.
You don't need to have a big garden or a lot of space, just the intention to give a positive spin to our waste. It's a way to give back to the planet a little of what it gives us, and at the same time nourish our plants naturally. So why not give it a try? With a couple of worms and some kitchen scraps, you could start making a difference at home. Dare to try it!